 Print This Post
I’m Marie from Underground Crafter and this is the third post in a series about improving your crocheting. If you’re new to crochet or just want to take your skills to the next level, these tips will help you.
In this post, I’m going to tackle a process that is commonplace in the knitting world but seems to intimidate many crocheters: blocking.
What is blocking (and why should you do it)?
Your yarn goes through many transitions from its start as unprocessed fiber through its transformation into a finished project. Blocking helps nudge the yarn in your project into its final resting state using some simple and inexpensive supplies.
It’s also a great way to fix up minor mistakes, like corners that roll up, or edges that aren’t even. If you’re making a garment or another project made from different pieces, blocking is also a great way to make sure pieces fit certain measurements before assembling.
Gather your supplies
To block your project, you’ll need just a few supplies.
- Pins to hold your project in place while it’s drying. For best results, use rust-proof pins, like quilter’s pins or T-pins.
- A soft surface to pin your project to while it’s drying. You can buy blocking boards or mats, or repurpose other items you may already have in your house, like a padded ironing board or children’s foam play mats. There are also tutorials for making your own blocking board.

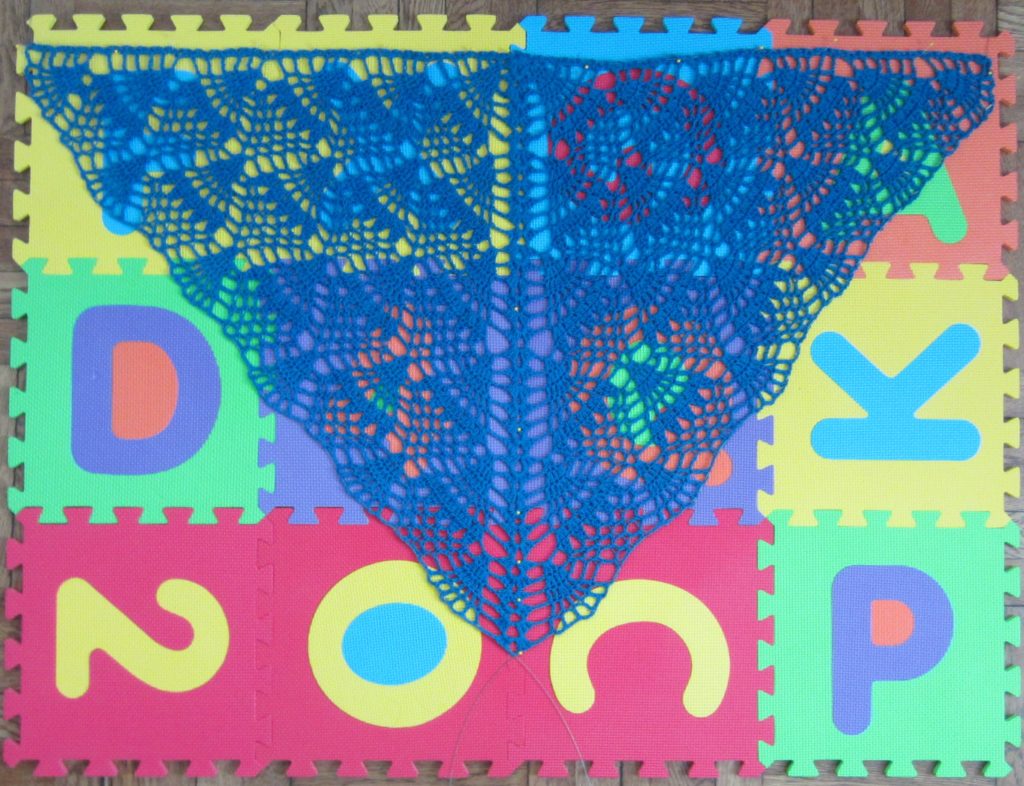
I use children’s play mats to block my projects, like the Pineapples for Everyone Shawl, a free crochet pattern.
- Water. Did you already guess that blocking involves getting your project wet since it needs to be pinned to a soft surface to dry?
Depending on the blocking method you choose, you may also need a spray bottle (for spray blocking), a clean towel (for wet blocking), or an iron or steamer (for steam blocking).
Choose the right blocking method
Your choice of blocking method should be based on the fiber content of your yarn and how much you’d like to change the shape of your final project.
- Spray blocking is suitable for all fiber types. With this method, you spray cold or room temperature water on the project and allow it to dry. This is the least invasive method of blocking and works well for opening up lace details, minor fixes to edges and measurement, and to reduce curl.
- Wet blocking is suitable for most fiber types. Follow the yarn label directions for washing to determine whether the project can be washed in cold or warm water and whether machine washing is recommended. If hand washing is recommended, use a clean towel to gently press water out of the project. (Don’t wring it out because you can weaken the yarn in your project.) Wet blocking is helpful for stubborn curled edges and not-so-minor fixes to edges and measurement.
- Steam blocking is sometimes called “killing” the yarn. As the name implies, it permanently changes the structure of the yarn by steaming it. Use a steamer or cover your project with a cloth and then press a steam iron on the cloth. (Don’t press the iron directly to your project as the heat can damage many fiber types.) Steam blocking is my method of last resort for when a project needs some major fixes. Steam blocking is not recommended for silk and other fibers that are vulnerable when wet.
Remember that you can always block more, but you can’t block less. Since spray blocking will usually work well, that’s where I recommend starting.
Block your project
For projects that require assembly, like garments, bags, or motif projects, block each piece individually first before joining.
For spray and steam blocking, gently pin your project to the soft surface, starting from the center and working your way out to the edges. Gently stretch and shape your project as you work, spraying it with water as you go.Use as many pins as necessary to keep edges even. Wet blocked projects should be washed first before pinning. Steam blocked projects should be steamed after they are blocked into position.
Once the project is pinned out, allow it to dry naturally. Once your project is dry, remove your pins and take a step back. Doesn’t it look great?
Do you have other blocking tips to share?
 Print This Post

